Is your WordPress site’s contact form receiving a lot of spam? Every day, millions of automated bots scour the web, targeting contact forms with waves of spam submissions. These submissions are not only frustrating but also can overwhelm legitimate customer inquiries, waste valuable time, and pose security risks to your website.
Fortunately, protecting your forms doesn’t mean frustrating real users with complex CAPTCHAs or puzzles anymore. Modern spam protection has evolved, offering sophisticated solutions that work silently in the background while maintaining a smooth user experience. In this guide, you’ll discover how to implement Cloudflare Turnstile – a powerful, user-friendly approach to form security that’s revolutionizing how WordPress sites handle spam protection.
The Power of Cloudflare Turnstile for WordPress Forms
Cloudflare Turnstile is a major improvement in form security technology, providing several important advantages over traditional CAPTCHA systems:
- Invisible Authentication: Unlike conventional CAPTCHAs that interrupt user flow with puzzles or image selection tasks, Turnstile works behind the scenes to validate legitimate users.
- Advanced Bot Detection: Leveraging Cloudflare’s vast network and machine learning capabilities, Turnstile accurately distinguishes between human users and automated bots.
- Improved Conversion Rates: By eliminating frustrating verification steps, Turnstile helps maintain higher form completion rates while maintaining security.
- Privacy-Focused: Turnstile operates without tracking users or collecting personal data, making it compliant with privacy regulations.
What You Need to Know Before You Start
Before beginning the tutorial, you must install a reliable form plugin on your site. When it comes to forms, FireBox is the best WordPress contact form plugin. It features a powerful form builder for WordPress based on the Gutenberg Block Editor. With a user-friendly interface, FireBox allows you to easily create and customize forms that convert and sync submissions with your favorite CRM such as MailChimp, Brevo, AcyMailing, and 8,000+ Zapier Apps.

FireBox offers precise control over when the forms appear, giving you access to creating personalized and targeted forms with display conditions based on Device, Referrer, Page, URL, Cookie, Geolocation, Datetime, and even conditions for WooCommerce.
Step 1: Download FireBox Lite
The very first step is to download FireBox Lite and install it on your WordPress site by following the steps listed below.
Step 2: Install FireBox Lite
After downloading the FireBox Free installation zip file, upload it to your site.
- Head to your WordPress dashboard and click on Plugins > Add New.
- Choose the zip file you have just downloaded. Click on install.
- Once the plugin is installed, click the Activate Plugin button to activate the plugin on your site.
If you need any help with the installation process, see the documentation on installing FireBox for help. Looking to go Pro? Don’t worry, if you’re already using FireBox Lite, you can easily upgrade from Lite to Pro. However, after upgrading to Pro, you must also activate your license to ensure you receive automatic plugin updates.
How to Create a WordPress Form with Cloudflare Turnstile Spam Protection
Once you’ve installed FireBox, you can start creating secure WordPress forms protected by Cloudflare Turnstile.
Step 1: Generate Cloudflare Turnstile Keys
The next step is to generate your Cloudflare Turnstile keys and add them to FireBox. This helps FireBox connect with Cloudflare Turnstile and help protect your forms from spam.
Step 2: Create a new FireBox campaign
Go to FireBox > Campaigns > Click on “New Campaign”
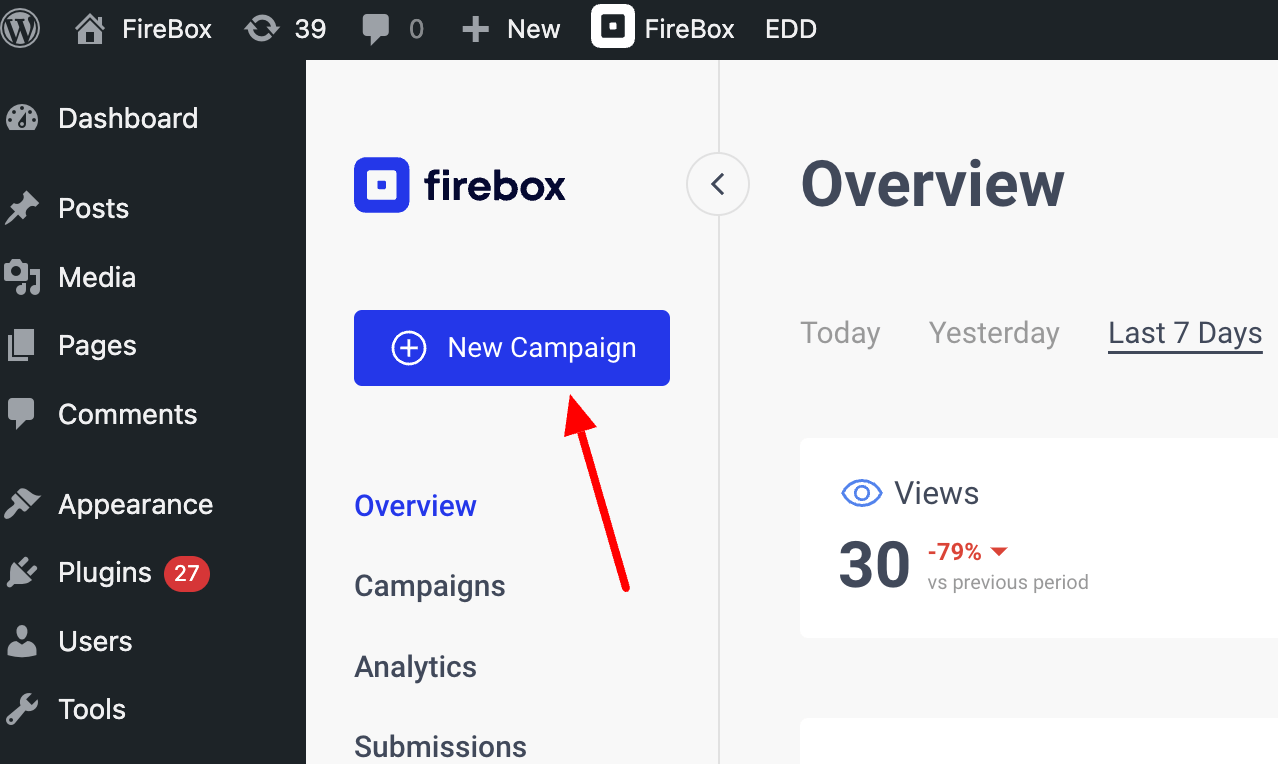
In the Template Library, click on “Start from Scratch” to get started with a blank canvas.

Step 3: Add a Form
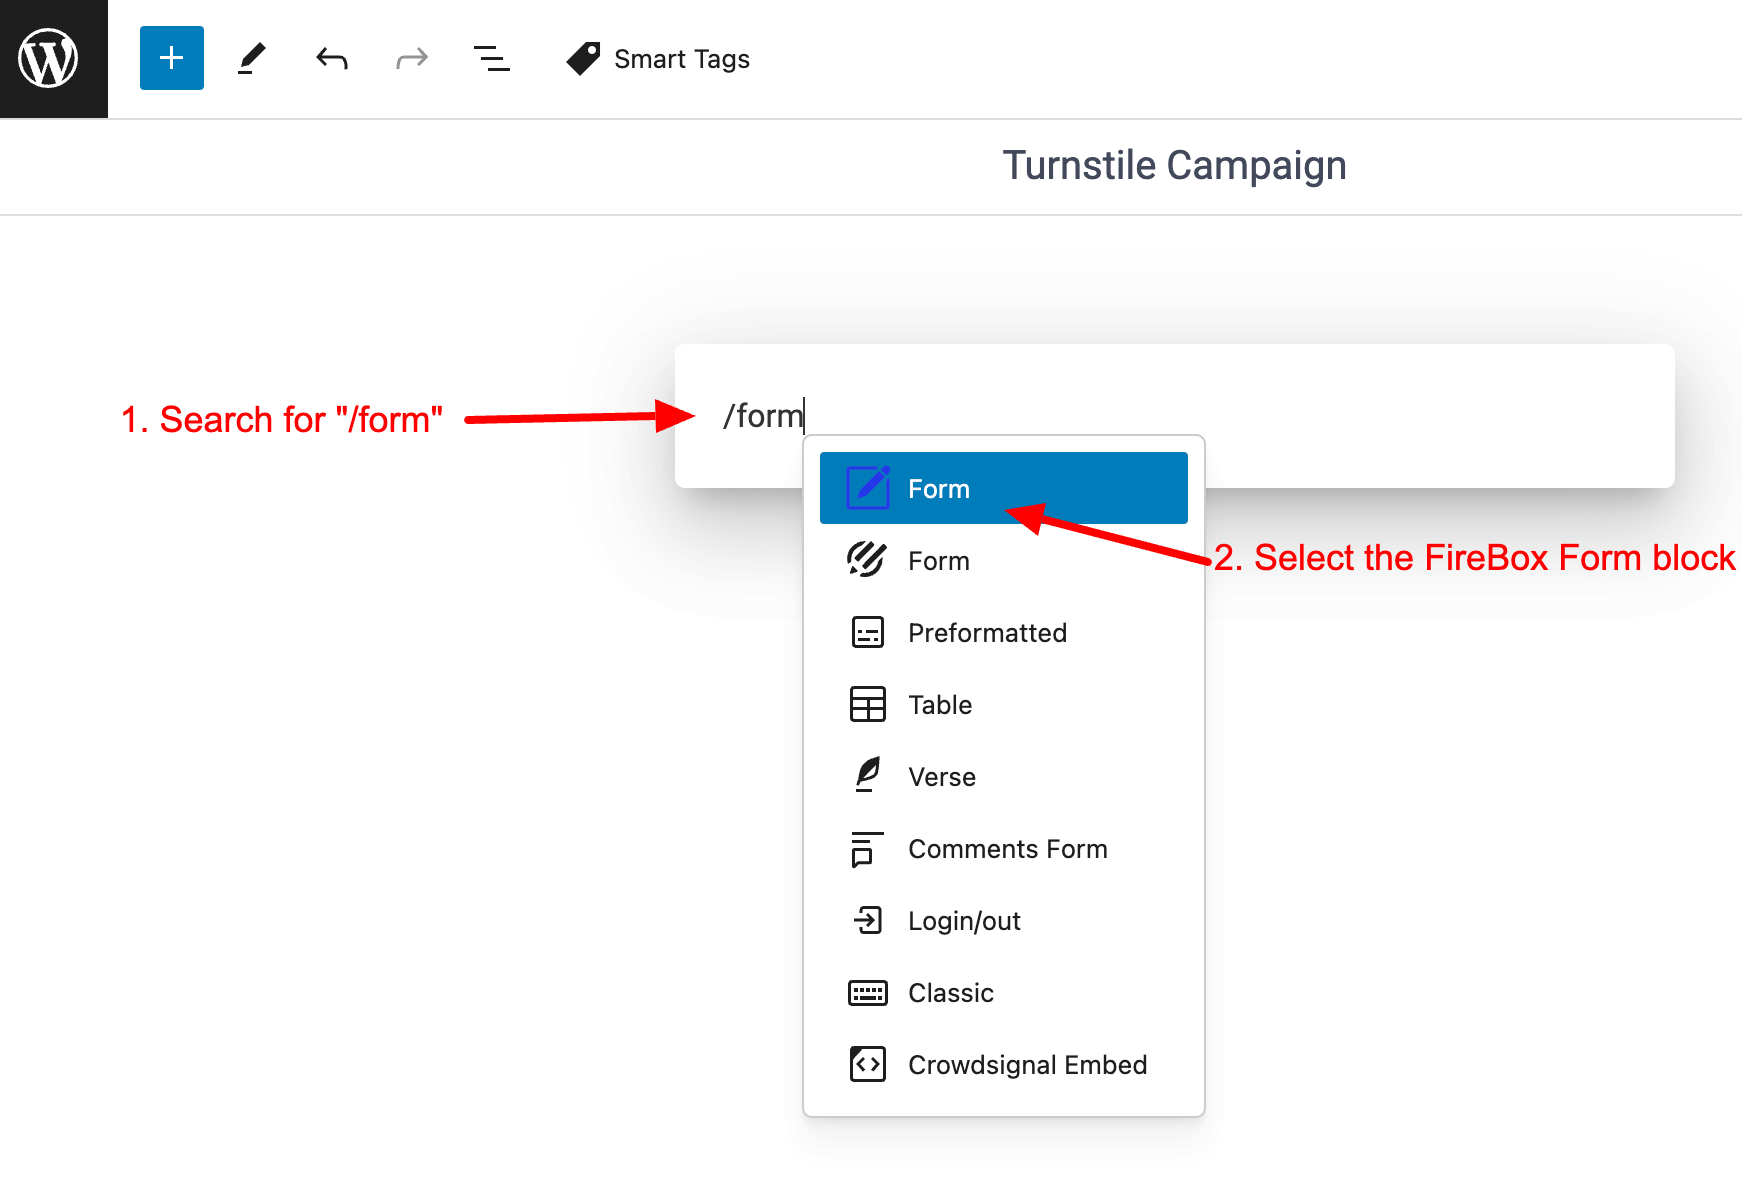
Within the FireBox Campaign Editor, get started by adding a new FireBox form block. To do so, type “/form” and select the FireBox form block as seen below.
Step 4: Add Turnstile form field
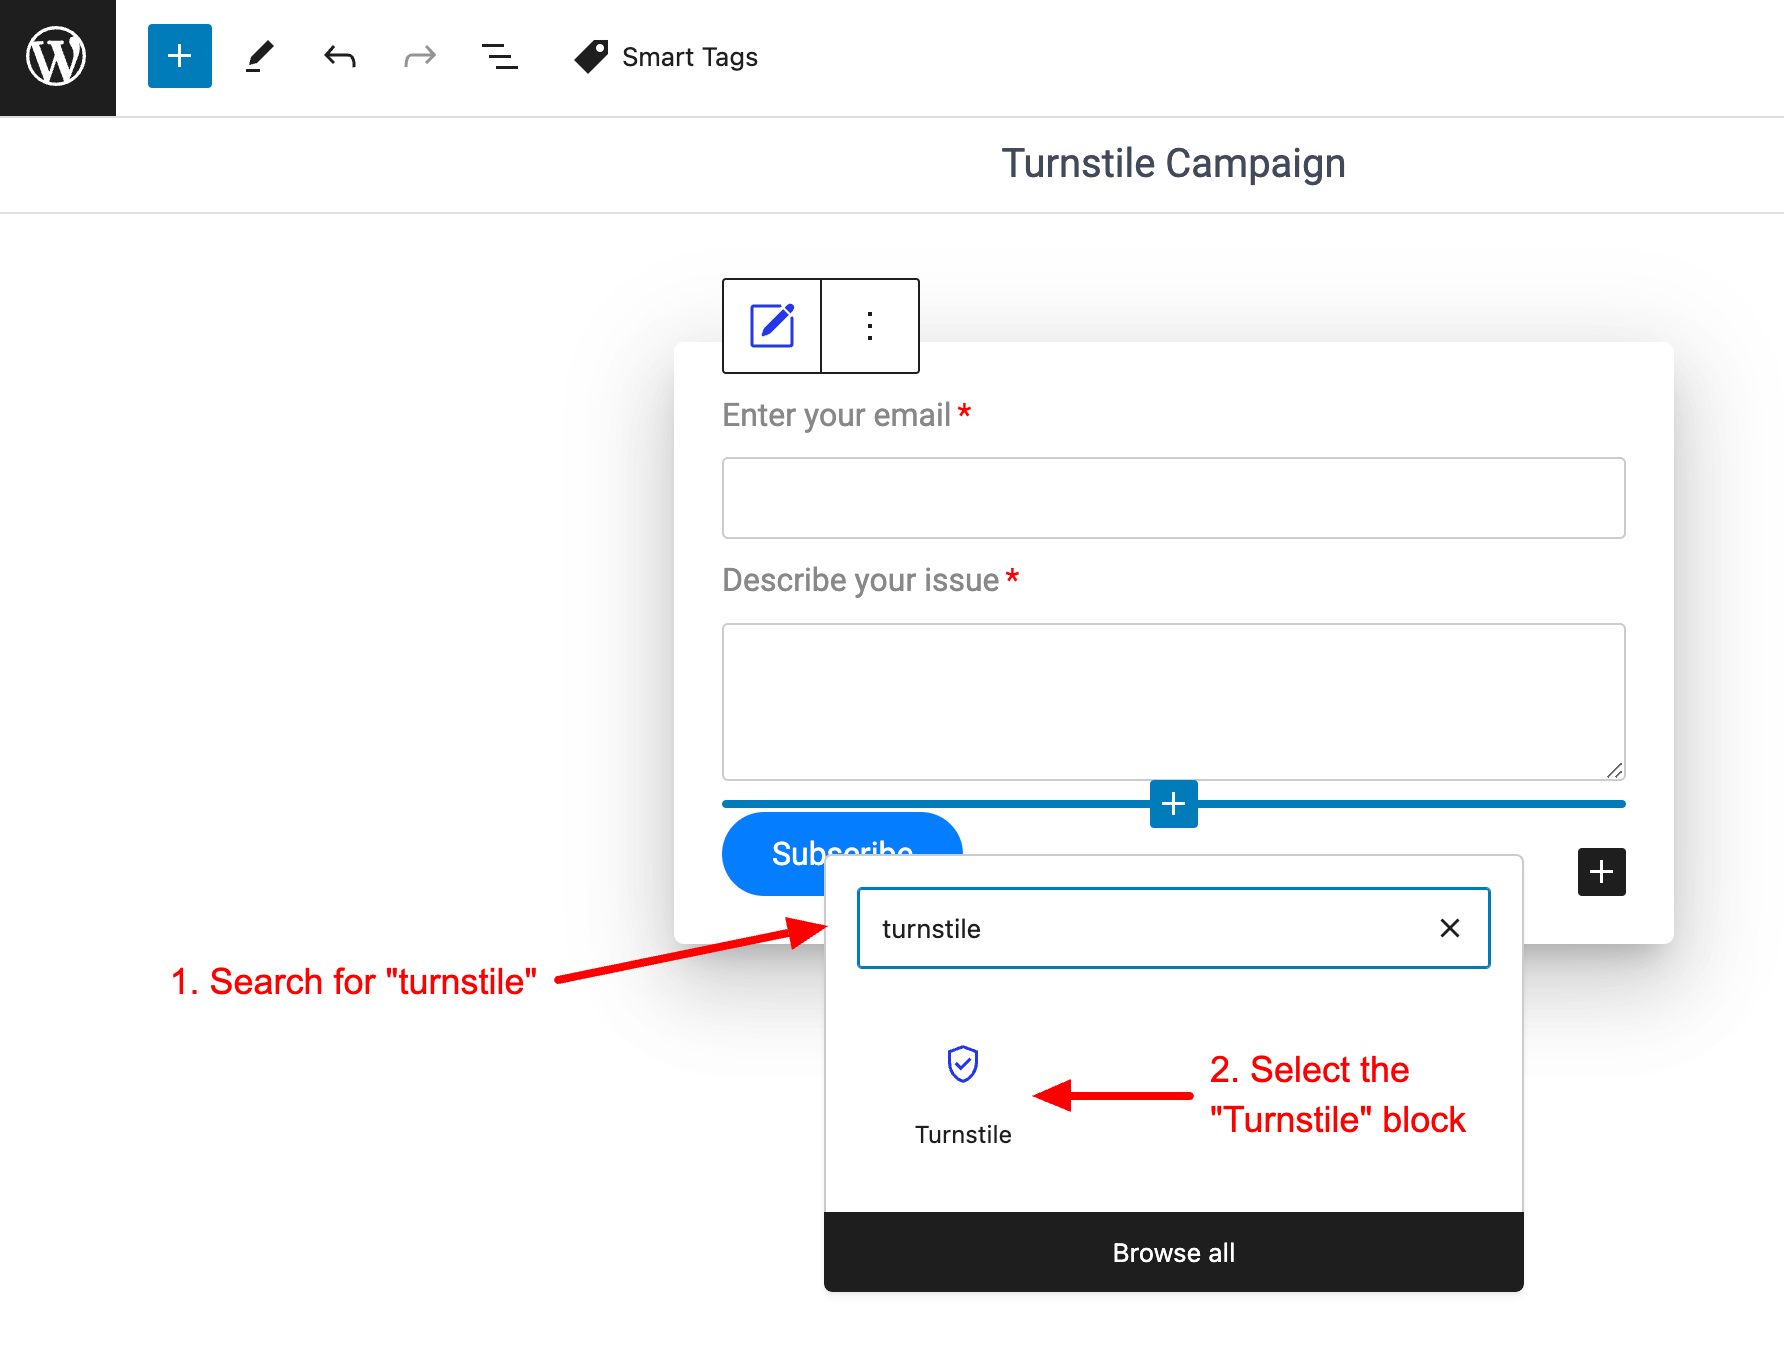
Once you’ve added your Form, it’s time to add the Cloudflare Turnstile form field into your form.
Search for “turnstile” and select the “Turnstile” block.
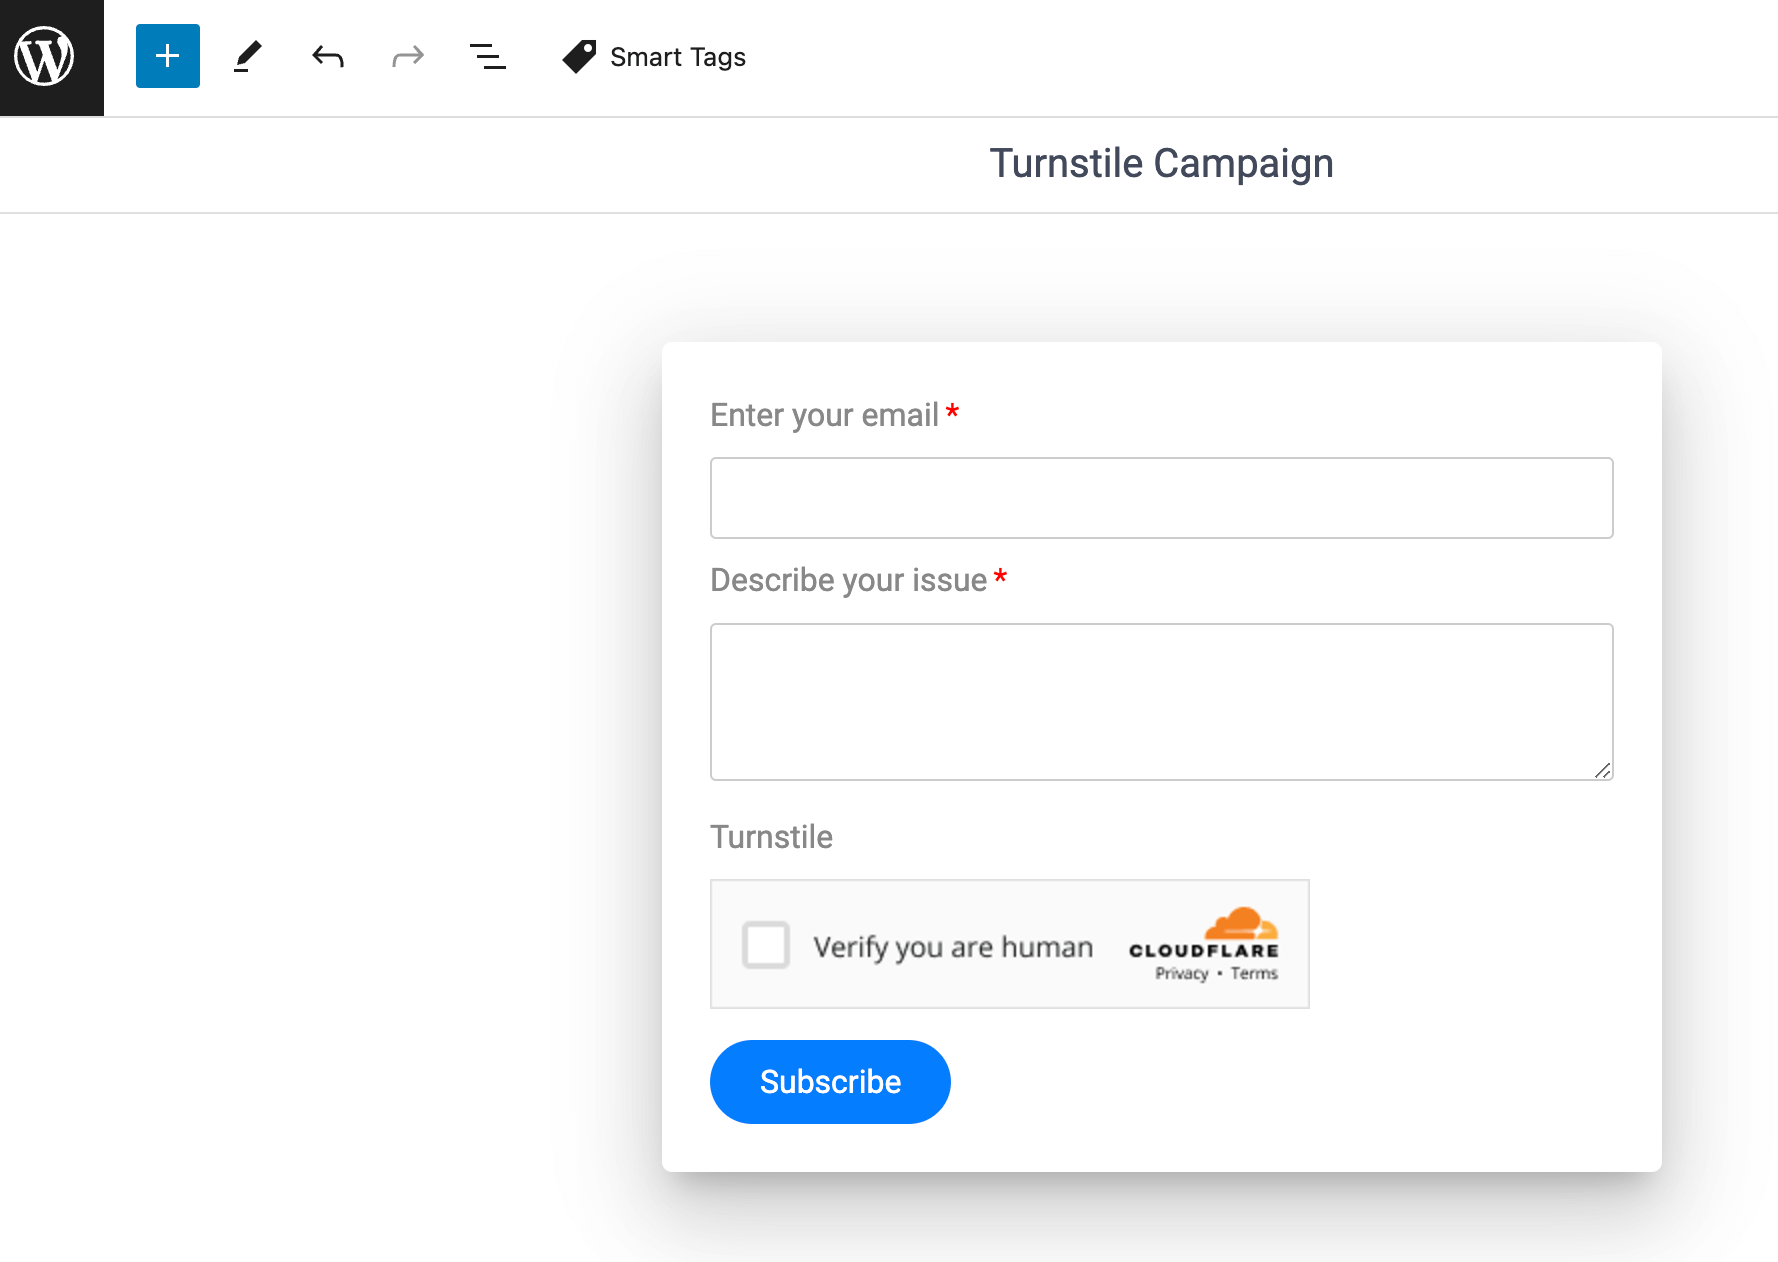
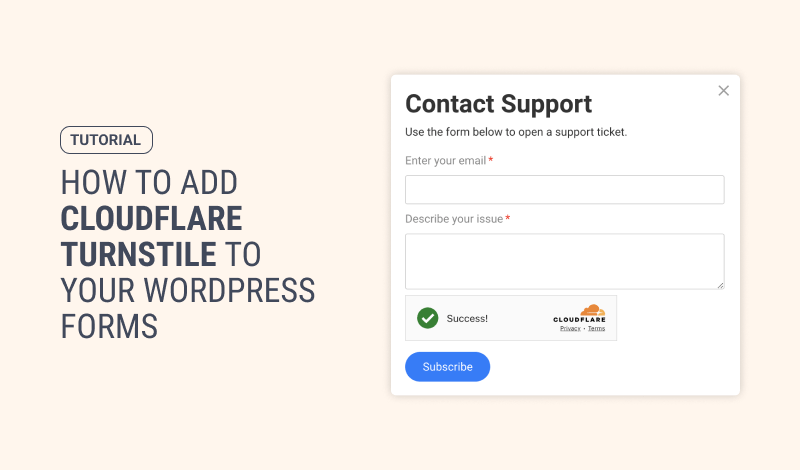
Once you’ve added the Turnstile block, you should be able to preview it within the form.
Conclusion
Ensuring the safety of your WordPress forms from spam is essential for protecting your website and receiving valuable submissions. By using Cloudflare Turnstile through FireBox, you have made an important choice to secure your forms while keeping the user experience simple and convenient.
Regularly check your form submissions and keep your plugins updated to ensure optimal security. With Turnstile in place, you can concentrate on engaging with authentic submissions rather than combating spam.
Ready to secure your WordPress forms? Start implementing Cloudflare Turnstile today and experience the perfect balance of security and usability.







0 Comments