


How to activate FireBox Pro
Congratulations on signing up for FireBox Pro. This guide walks you through the entire process of activating FireBox Pro on your WordPress site so you can start benefiting from the extra features it includes.
Authorize Your Site
Once you purchase FireBox Pro, you will be provided with a license key that you can use to receive updates. In order to be able to use the license key you must authorize your site to use it. To do so follow the steps below:
- Go to fireplugins.com/account/orders
- Find your order and click on View Licenses
- Find FireBox and click on Manage Sites
- Enter your Site’s URL on the input field and press Add Site
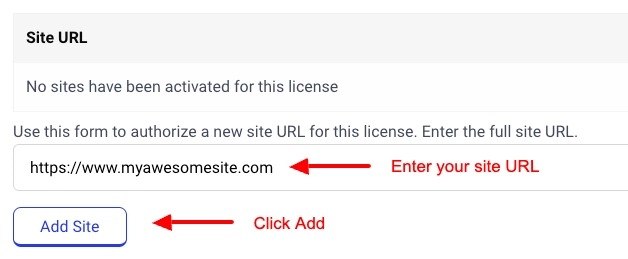
- Your site is now authorized. Proceed to the next step.
Enter your License Key in FireBox Settings
To enter your license key follow the steps listed below:
- Go to your WordPress Dashboard
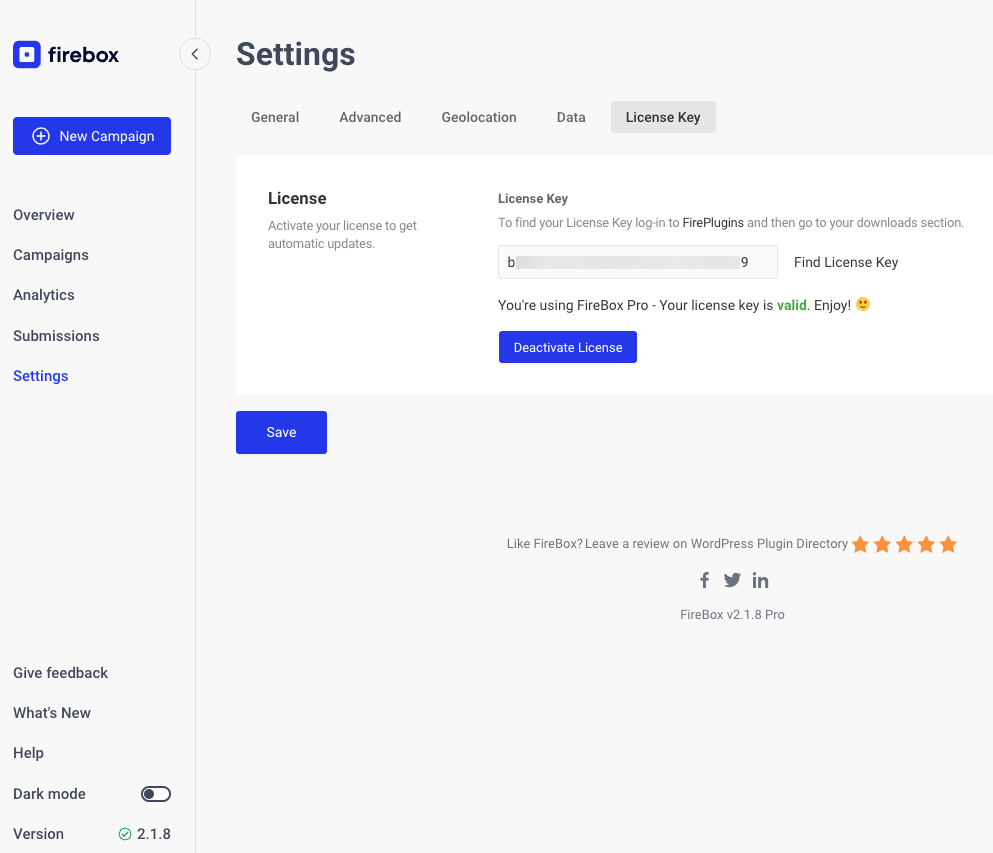
- On the left-hand side, go to FireBox > Settings
- Click on License Key on the left-hand sidebar
- Enter your license key and click Activate License
Once you click “Activate License”, your license key will be validated, and you will be able to receive updates.
Status of License Key
Once you have entered a license key, you will be able to see the status of the license key in correspondence with the site you have entered it. If you do not get an “Active” status, this means one of the following:
- Your license key is invalid
- Your license key has expired
- Your site has not been added authorized. Check if your site is authorized by going on FirePlugins > Account > Orders > find your order > View Licenses > Manage Sites and ensure your site is authorized.
You will notice that the “Activate License” button has changed to “Deactivate License”. This allows you to deactivate the license from your site in order to use it on another site of your choice.