


Install FireBox Lite
This guide will help you install our free WordPress popup plugin, known as FireBox Lite, on your WordPress site. Before proceeding with the installation, ensure your system meets the System Requirements.
The best way to install the free version of our plugin is through the plugin search in your dashboard. To do so, visit the Plugins > Add New page inside your WordPress admin area.
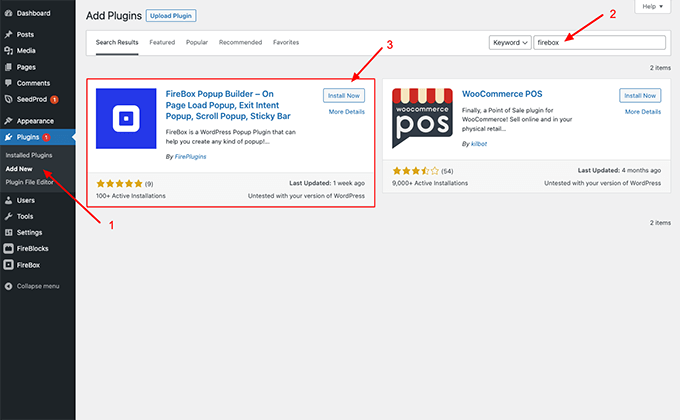
You will see a screen like the one in the screenshot above. In the search box at the top right corner, type “FireBox” and hit enter. After that, you will see the plugin in the results. Click the Install Now button and then click Activate.
All done, the FireBox popup plugin is now installed successfully!
Was this helpful?